

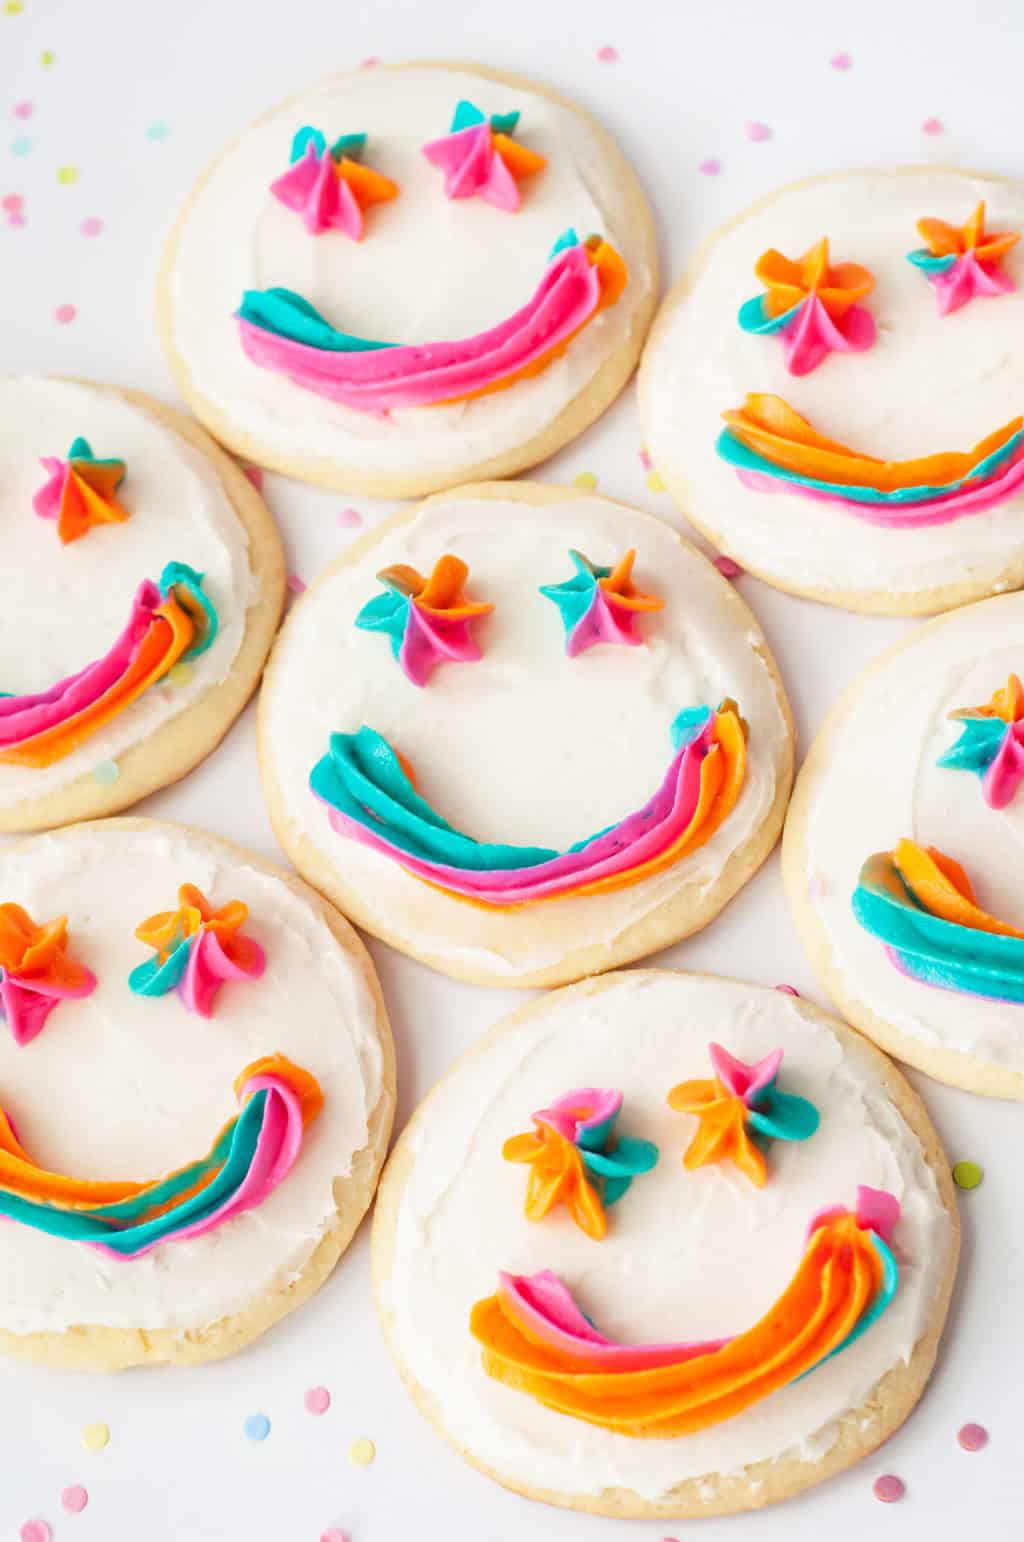
Frosted sugar cookies piped with colorful, frosting smiley faces. Perfect for kids’ birthday parties, school birthday treats, and any occasion. A fun celebration alternative to cake or cupcakes.

Originally posted on Live Party Love – moved to Northern Yum
Smiley face cookies—we’re excited to share a piece of our childhood with you. These cookies are the ultimate birthday treat and a great alternative to cake. They bring back some great memories. Walking into class with a cardboard flat of smiley face cookies was a BIG deal back in the day.
Find What You’re Looking for:
Ingredients
Here are the simple ingredients you’ll need to make these fun cookies.
Sugar Cookies
- 2 cups sugar – white, granulated.
- 1 cup butter – unsalted butter (or skip the added salt).
- 3 eggs – whole eggs.
- 6 tablespoons milk – 2% milk.
- 5 cups flour – all-purpose.
- 2 teaspoons baking powder – regular baking powder.
- 1/2 teaspoon salt – regular table salt.
Frosting
- 3/4 cup butter – salted butter.
- 3/4 cup shortening – plain shortening, not butter-flavored.
- 5 2/3 cups powdered sugar – confectioners sugar.
- 6-7 tablespoons cream – heavy cream.
- 2 teaspoons vanilla – clear if possible.
- Food coloring – any colors you’d like.
Note: We wanted the base frosting to be as white as possible, so we used a mix of shortening and butter, along with a clear vanilla. You can use all butter and regular vanilla extract if needed.
Supplies
- 4-inch cookie cutter
- Rolling pin
- Parchment paper
- Baking sheet
- Angled icing spatula
- 3-color icing coupler set
- Disposable decorating bags
When using a 4-inch cookie cutter, this recipe makes approximately 24 to 28 cookies.
How to Make Smiley Face Cookies
Here is a step-by-step tutorial for both the sugar cookies and frosting.
Step 1 | Preheat oven to 350°F
Preheat your oven to 350 degrees Fahrenheit.
Step 2 | Mix the cookie dough
Begin by creaming together the sugar, butter, eggs, and milk. Add the dry ingredients, including flour, salt, and baking powder.
Step 3 | roll and cut cookies
Roll the dough to 1/4 inch thick. Then, cut the cookies with a 4-inch cookie cutter. Carefully transfer the cookies with a flat spatula to a parchment-covered baking pan.

Step 4 | Bake cookies for 10 minutes
Bake at 350 degrees for 10 minutes. It’s important you don’t overcook them to make sure they turn out super soft.
Step 5 | Allow cookies to cool
Allow the cookies to cool. Otherwise, you may end up with droopy faces, and nobody wants that. *Haha*
Step 6 | mix frosting
Begin by mixing together the softened butter and shortening. Add powdered sugar one cup at a time. Mix well.
Mix in cream and vanilla. Add additional cream to reach the desired consistency.

Step 7 | Frost cookies with the white base layer
Frost all the cookies using white icing.
Step 8 | Add food coloring to the remaining frosting
Then, separate the remaining icing into 3 different bowls. Add food coloring to reach the desired brightness.
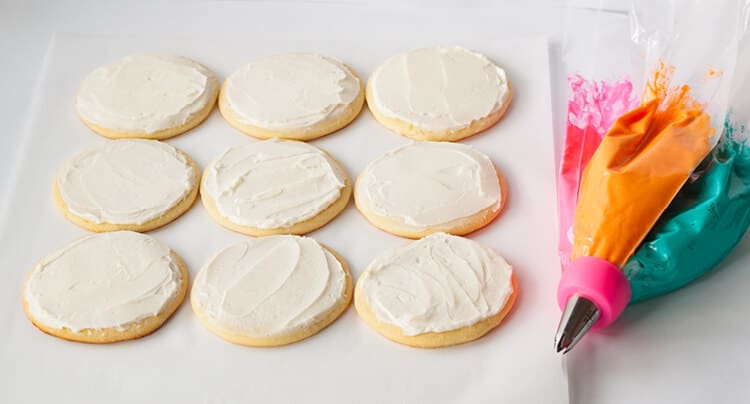
Step 9 | Add to frosting piper with decorating tip
We used a 3 color icing coupler set to pipe the eyes and mouth. It worked really great!
To use the 3-color icing coupler, Insert the white plastic end into the piping bag. Add each color into a separate decorating bag. (Folding the bag down makes it easy to load with frosting.)
Bring together each icing bag and line up the plastic ends. Attach the decorating tip and fasten. We used a star tip, but feel free to try different decorating tips.
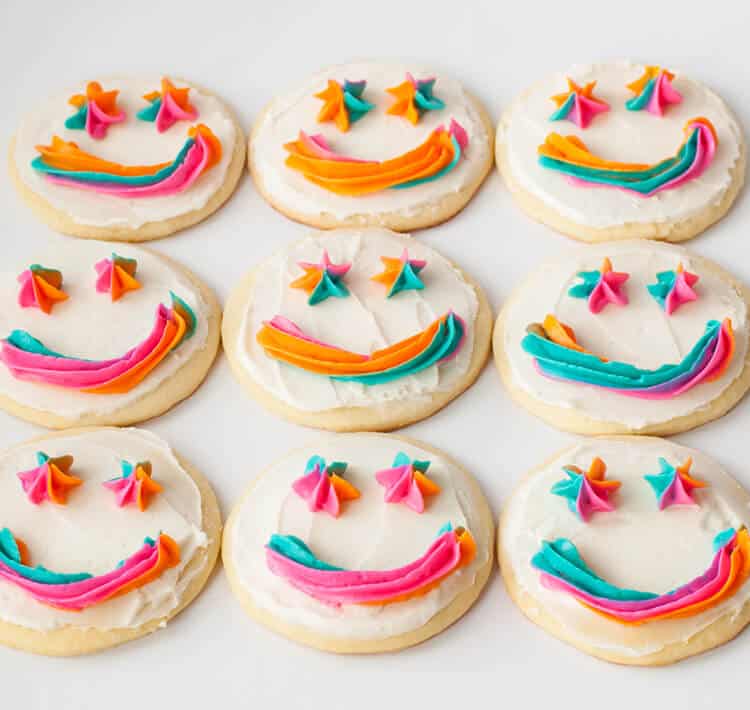
Step 10 | Pipe eyes and mouth on cookies
Apply the eyes and mouth on each cookie.
Step 11 | Enjoy or store for later
Then, store them in a plastic container to keep them soft until you serve them.
They are great for kids’ birthdays, but they truly will brighten any occasion. And it’s so simple to change the colors to match your party palette.
More About This Recipe
- If you’re from Sidney or have spent much time in Sidney, Montana, you know how big of a deal ‘face cookies’ are. Philadelphia has Philly Cheese Steak, Minneapolis has the Juicy Lucy, Seattle has Coffee & Dungeness Crab—and Sidney, Montana has Smiley Face Cookies. The bakery has since closed, but you can still find them at the local grocery store.
- Our version may not be exactly the same, but they’re still delicious and so much fun. It brings back that nostalgic feeling from our childhood.
- Smiley face cookies are perfect for school birthday treats or birthday parties. And the way the piping on our eyes turned out, they’d work great for an emoji or clown-themed party.
Smiley Face Cookies – Frosted Sugar Cookies
Frosted sugar cookies piped with colorful frosting smiley faces. Perfect for kids’ birthday parties, school birthday treats, and any occasion. A fun celebration alternative to cake or cupcakes.
- Total Time: 1 hour 30 minutes
- Yield: 24 to 48 cookies 1x
Ingredients
Sugar Cookies
- 2 cups granulated sugar
- 1 cup butter
- 3 eggs
- 6 tablespoons milk
- 5 cups flour
- 2 teaspoons baking powder
- 1/2 teaspoon salt
Frosting
- 3/4 cup butter
- 3/4 cup shortening
- 5 2/3 cups powdered sugar
- 6–7 tablespoons cream
- 2 teaspoons vanilla (clear if possible)
- Food coloring
Instructions
- Begin by creaming together sugar, butter, egg, and milk. Add dry ingredients including flour, salt, and baking powder. Mix to form dough.
- Roll dough to 1/4 inch thick.
- Cut cookies with a 4-inch cookie cutter. Place on baking sheet covered with parchment.
- Bake at 350 degrees for 10 minutes. It’s important that you don’t overcook or the cookies will not be soft.
- Allow the cookies to cool.
- For the frosting, mix together softened butter and shortening.
- Add powdered sugar one cup at a time. Mix well.
- Mix in cream and vanilla. Add additional cream to achieve desired consistency.
- Frost all cookies using white icing.
- Then separate the remaining icing into 3 different bowls. Add food coloring to reach desired brightness.
- Add to a piping bag (we used a 3 tip coupler) with a decorating tip. (see tips for filling piping bag here)
- Apply eyes and mouth on each cookie.
- Enjoy right away or store in an airtight plastic container to keep them soft.
Notes
- Do not overbake these cookies to make sure you have soft cookies!
- Store these cookies in an airtight plastic container to keep them soft.
- Prep Time: 1 hour 20 minutes
- Cook Time: 10 minutes
- Category: Cookies
- Method: Baking
- Cuisine: American
Find it online: https://northernyum.com/blog/smiley-face-cookies/

Frequently Asked Questions
Here are answers to commonly asked questions about making smiley face cookies.
How should I store frosted sugar cookies?
We like to store cookies in an airtight plastic container. You can store them in the refrigerator or the freezer for more extended periods.
How do I make sure my cookies are soft?
Two tricks here: 1) make sure you don’t overbake them, or they will be crunchy, and 2) store them in an airtight plastic container to maintain softness.
Final Thoughts
These frosted sugar cookies, piped with colorful smiley faces, are a delightful and simple alternative to traditional cakes and cupcakes, perfect for school birthday treats, kids’ parties, or any special occasion. Get creative with frosting colors and share the joy with your loved ones today!
⭐⭐⭐⭐⭐
Have You Tried This Recipe? Please rate it in the comments and let us know your thoughts!
More Dessert Recipes
More Cookie Recipes
Pin for later


Save This Recipe
We’ll email you a link to this recipe and add you to our email list for new recipes and updates!
(You can save a recipe on our site once per 24 hours.)