

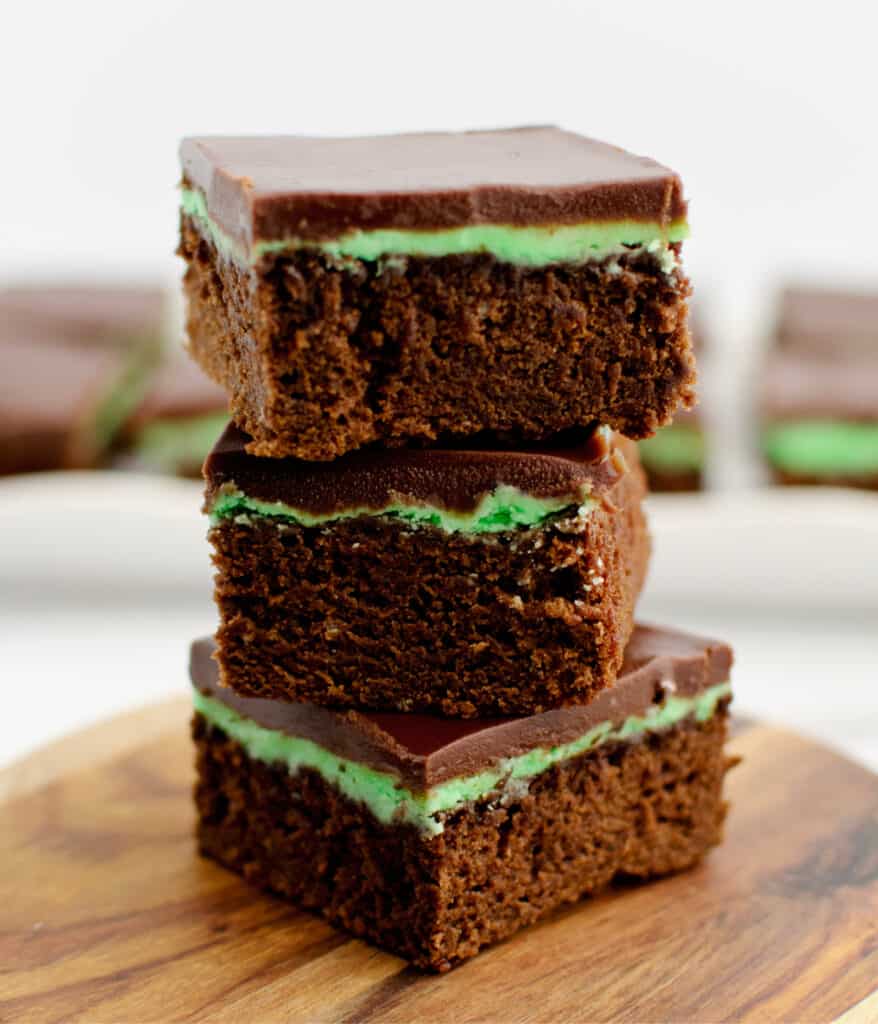
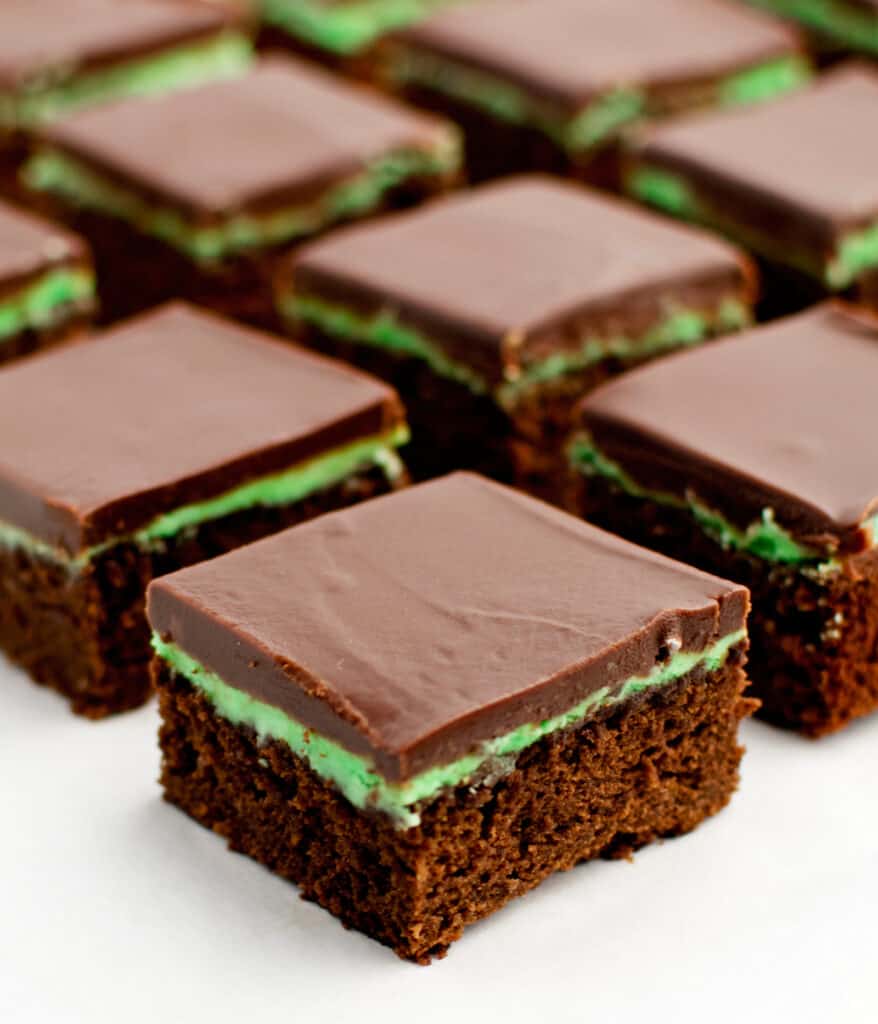
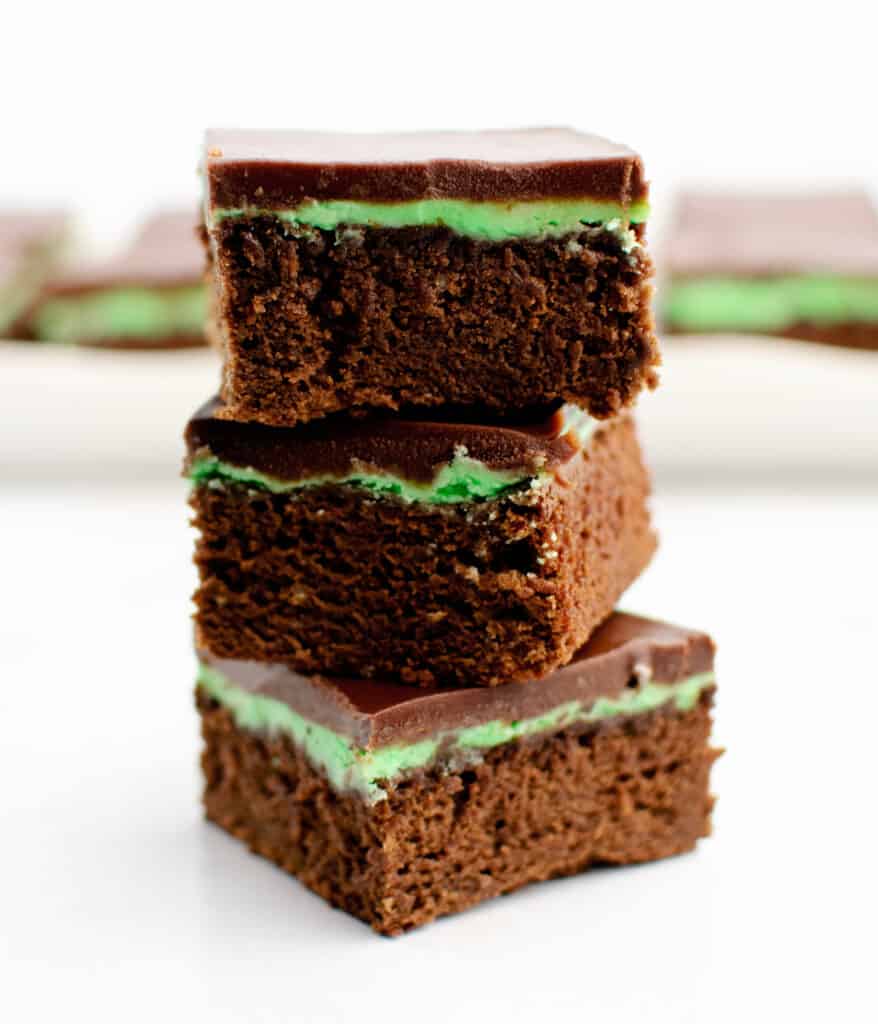
Mint chocolate brownies have three decadent layers of brownie, mint filling, and ganache—the perfect green dessert for St. Patrick’s Day or whenever a chocolate & mint craving hits.

Calling all mint and chocolate lovers: we have the perfect sweet treat for you – mint chocolate brownies! They not only taste delicious but look amazing, too.
Find What You’re Looking for:
This is our mom’s recipe for mint brownies featuring a base layer of cakey brownie, topped with a minty buttercream filling, and finished with a mint chocolate ganache. She typically makes them for Christmas, but we think these brownies are perfect for St. Patrick’s Day (or any holiday), baby showers, bridal showers, and birthdays.
Whether making them for your family or serving them up at a party, these layered brownies are sure to please. Let’s get baking!
Ingredients for Mint Brownies
Three layers of deliciousness; here are the ingredients you’ll need for each layer.
Brownie Layer
Here is what you’ll need for the brownie batter.
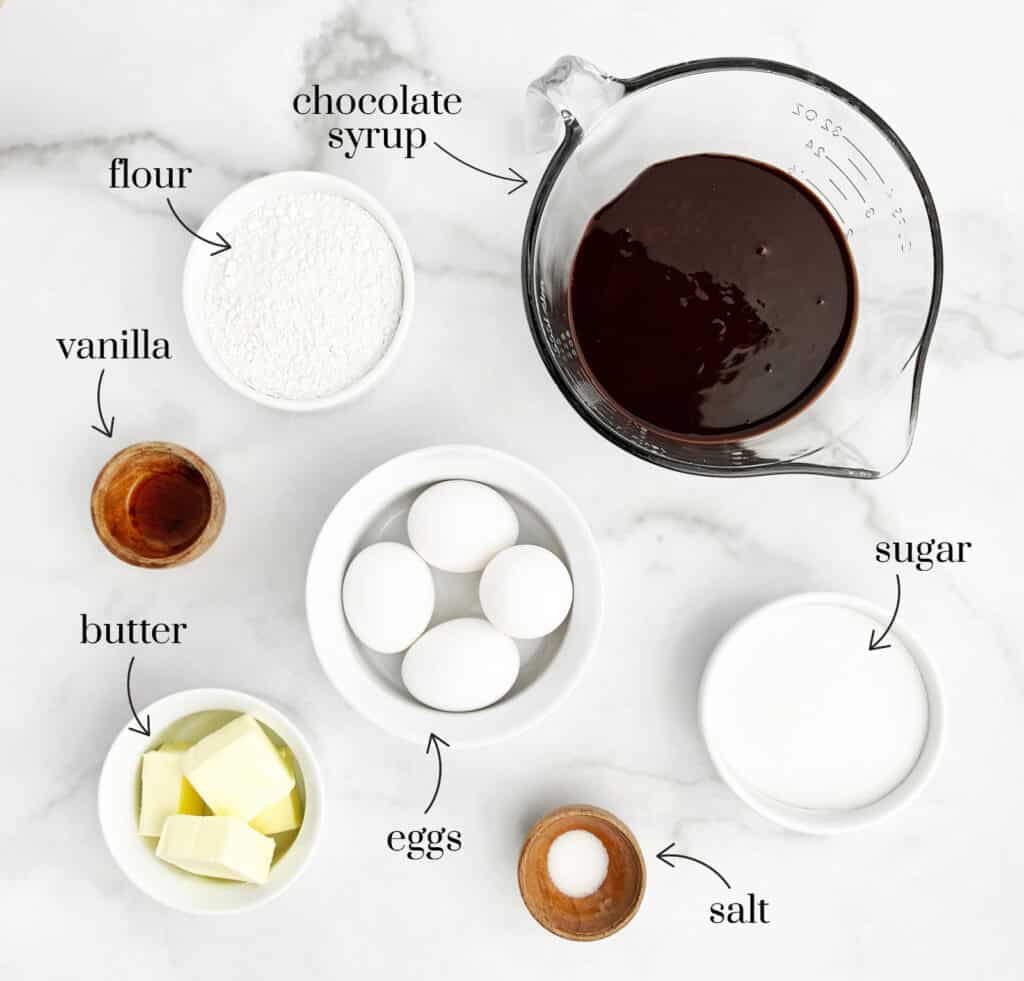
Flour – regular all-purpose flour.
Butter – unsalted butter.
Salt – regular table salt.
Eggs – whole eggs—both whites and yolks.
Chocolate syrup – chocolate syrup like Hershey’s or Ghirardelli chocolate sauce.
Sugar – granulated sugar.
Vanilla – pure vanilla extract.
Mint Filling
Here are the ingredients for the middle layer – mint buttercream filling.
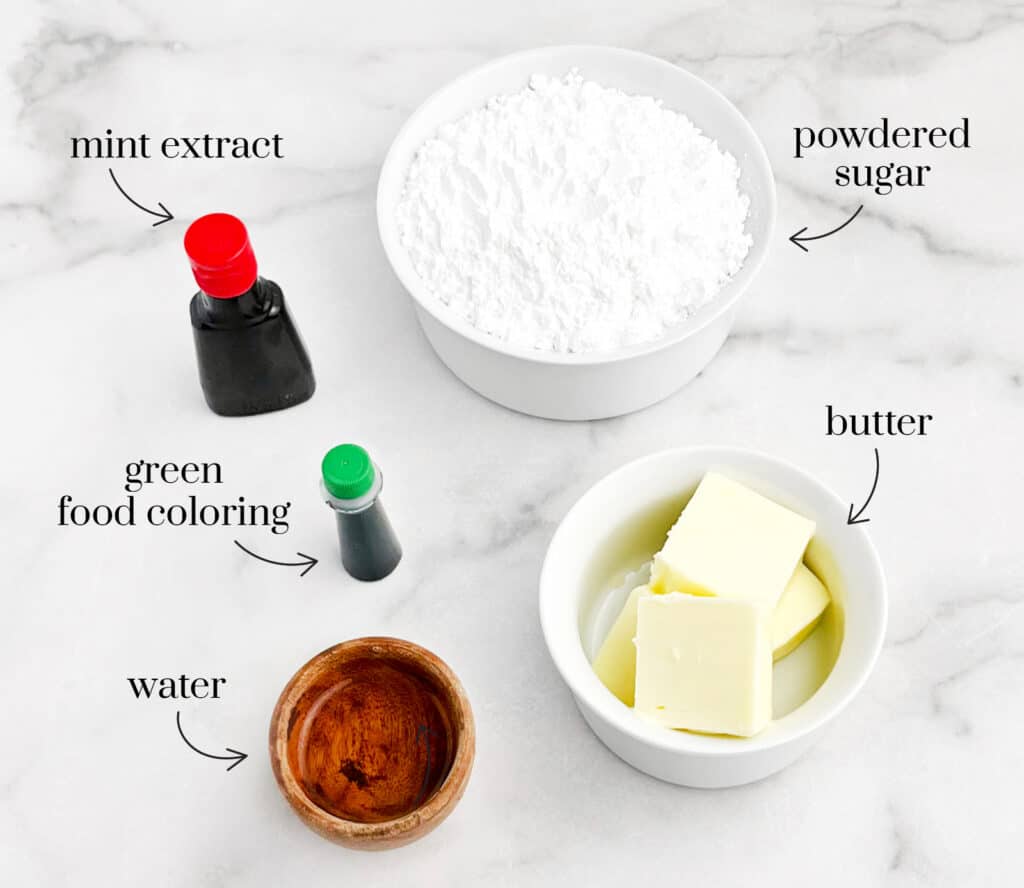
Powdered sugar – confectioner’s sugar.
Butter – salted or unsalted butter.
Mint extract – pure mint extract.
Food coloring – green food coloring—regular or gel will work fine.
Chocolate Topping
Finally, here is what you will need for the chocolate ganache layer.
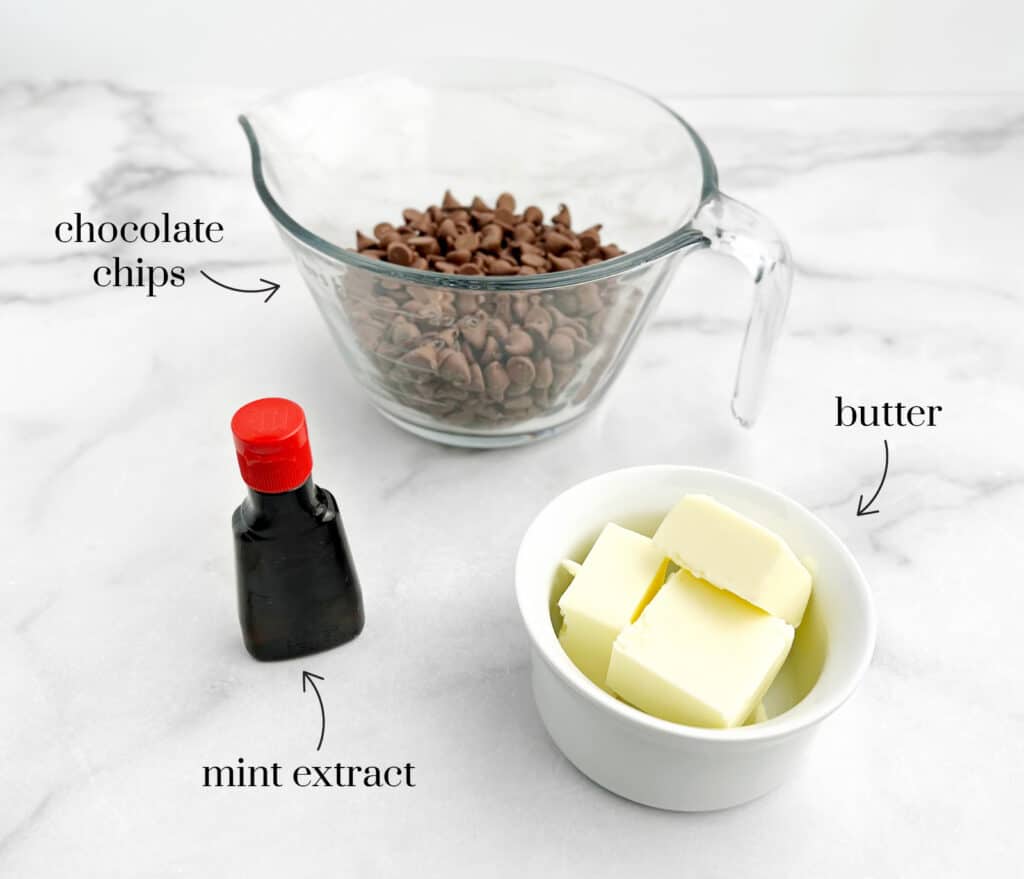
Milk chocolate chips – milk chocolate chips, we usually use Tollhouse.
Butter – salted or unsalted butter.
Mint extract – pure mint extract.
Note: you can also use mint chocolate chips—if you can find them (instead of chocolate chips and mint extract separately).
🍫 Learn How to Melt Chocolate Chips 3 Ways here.
Supplies & Favorite Tools for Making Brownies
Stand mixer or mixing bowls and hand mixer – a stand mixer works wonderfully for the brownie batter and mint filling layers. You can also use a hand mixer.
Microwavable bowl and spoon – you’ll need a microwave-safe bowl to melt the chocolate for the ganache layer.
13 x 9 pan – we use a 13 x 9 metal baking pan.
Parchment paper – using parchment will allow you to remove the brownies from the pan and cut them more easily.
Measuring cups and spoons – you will need various sizes of measuring cups and spoons.
Spatulas – a rubber spatula for batter and mint filling. An angled spatula for spreading the mint layer and chocolate ganache.
Knife and ruler – a ruler is optional but helpful to cut the brownies into equal pieces. We recommend a longer (8-inch), sharp chef’s knife to cut the brownies.
How to Make Mint Chocolate Brownies
Follow these simple steps to make decadent mint brownies.
Step 1 | Preheat Oven
Preheat the oven to 350 degrees Fahrenheit.
Step 2 | PrePare the Baking Pan
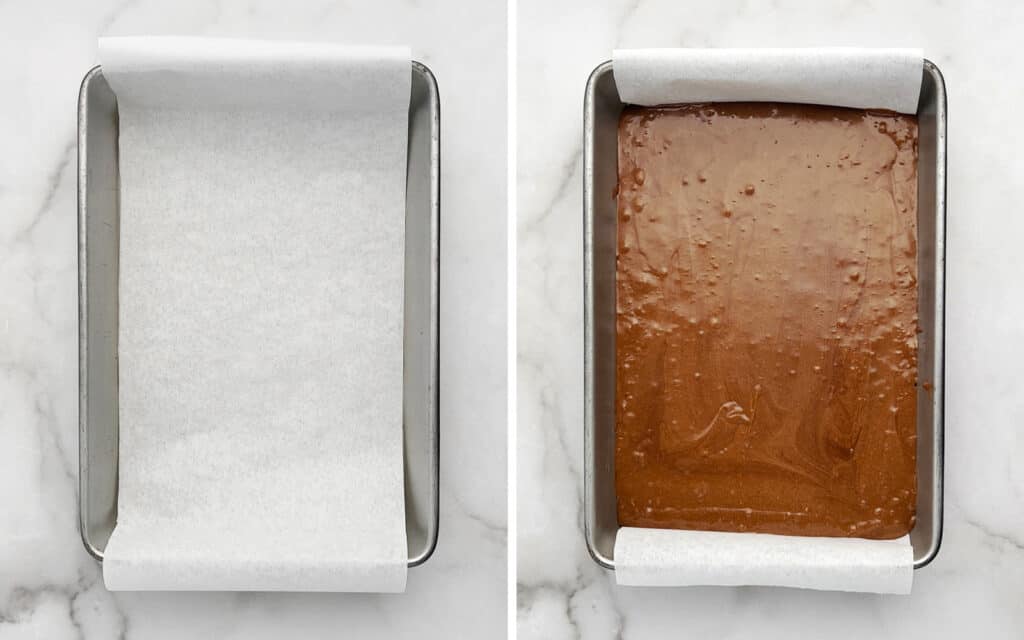
Line a 13 x 9 baking pan with parchment paper.
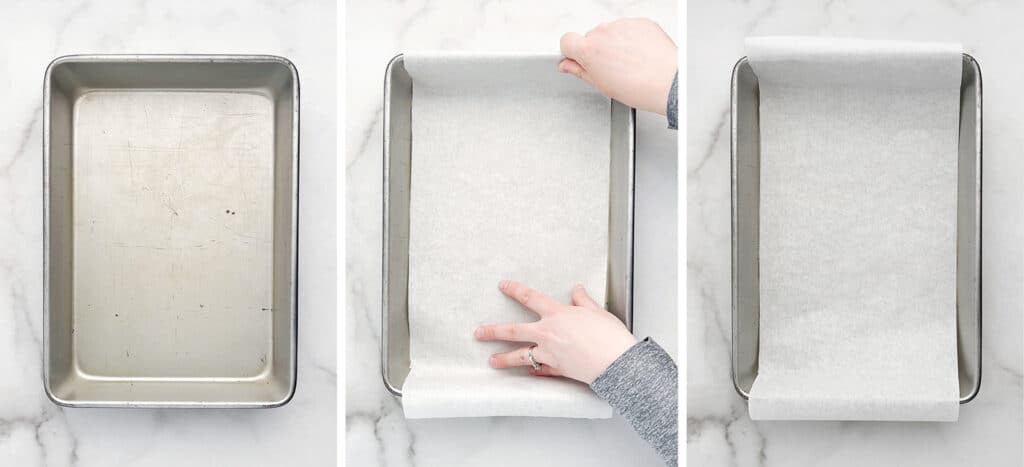
Pro Tip: creating a parchment paper ‘sling’ makes the brownies easy to remove after baking. To do this—line the bottom of the pan lengthwise with about an inch sticking out of the top of the pan on both ends – this makes ‘handles’ to use when removing the baked brownies. You can also use binder clips to keep the parchment in place while pouring the batter in – just be sure to remove them before baking unless they are oven-safe.
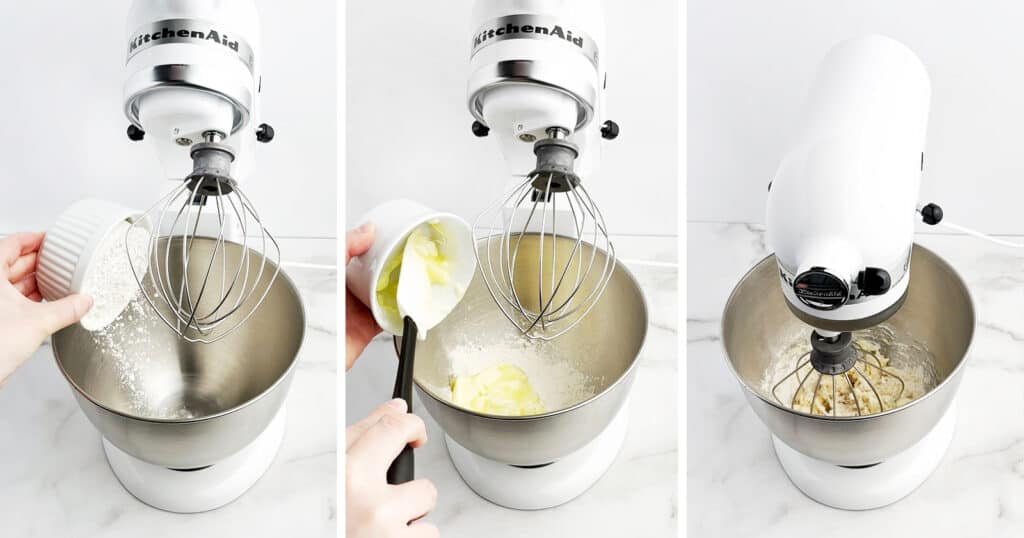
Step 3 | layer 1: BROWNIE – mix flour and butter
Start making the brownie batter by combining the flour and softened butter.
Step 4 | Layer 1: BROWNIE – Add salt, eggs, and chocolate syrup
Add the salt, eggs, and chocolate syrup to the flour and butter mixture.
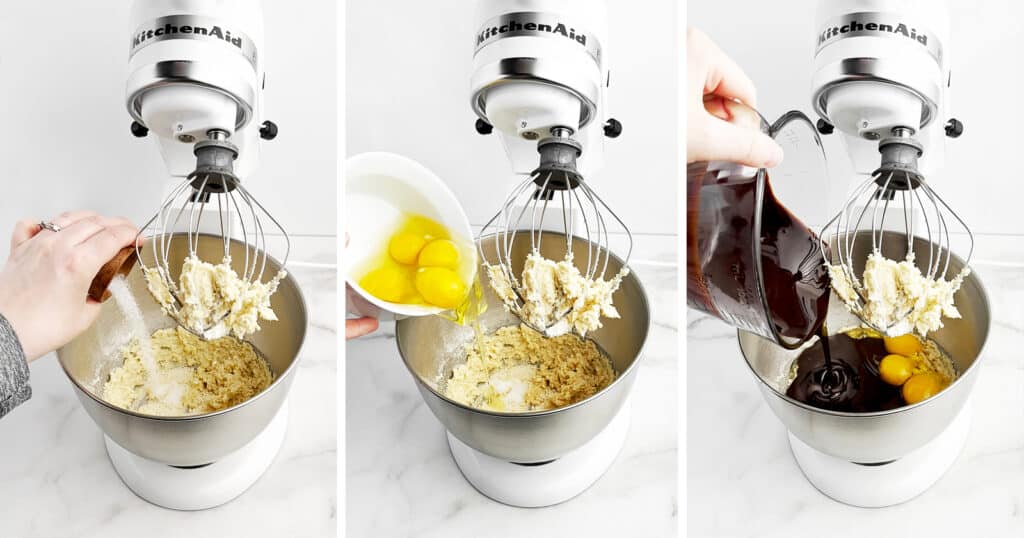
Step 5 | layer 1: BROWNIE – Add sugar and vanilla
Finally, add the sugar and vanilla. Mix until well combined.

Step 6 | Layer 1: BROWNIE – add brownie batter to the pan
Pour batter into the prepared 13 x 9 baking pan. Use a spatula to spread it around the pan evenly and into the corners.
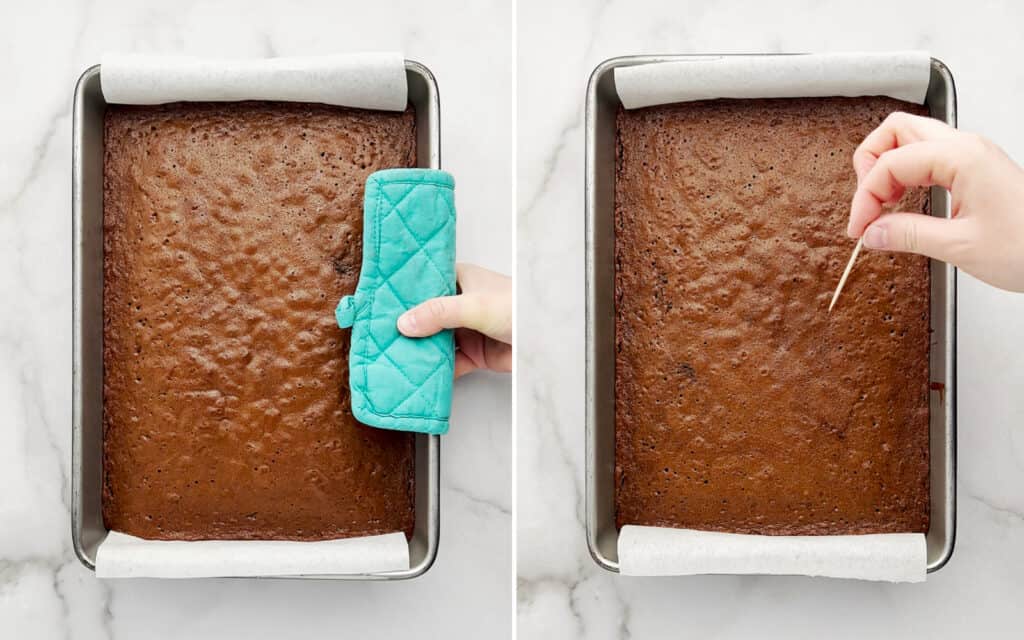
Step 7 | Layer 1: BROWNIE – Bake for 35 to 40 minutes
At 350 degrees Fahrenheit, cook the brownies for 35 to 40 minutes (or until a toothpick comes out clean). Important: cool entirely before adding layer 2, mint frosting.
Step 8 | layer 2: MINT Filling – cream powdered sugar, butter, and mint
Start the mint filling by combining powdered sugar, butter, and mint extract.
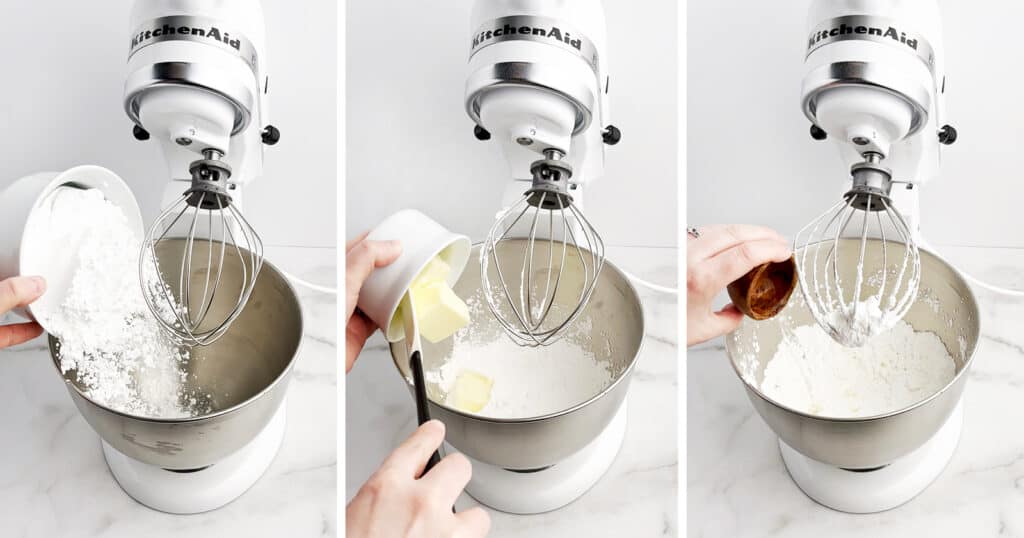
Step 9 | layer 2: MINT Filling – add green food coloring
Add 3 to 4 drops of green food coloring. Double if preferred to make it a bit darker.
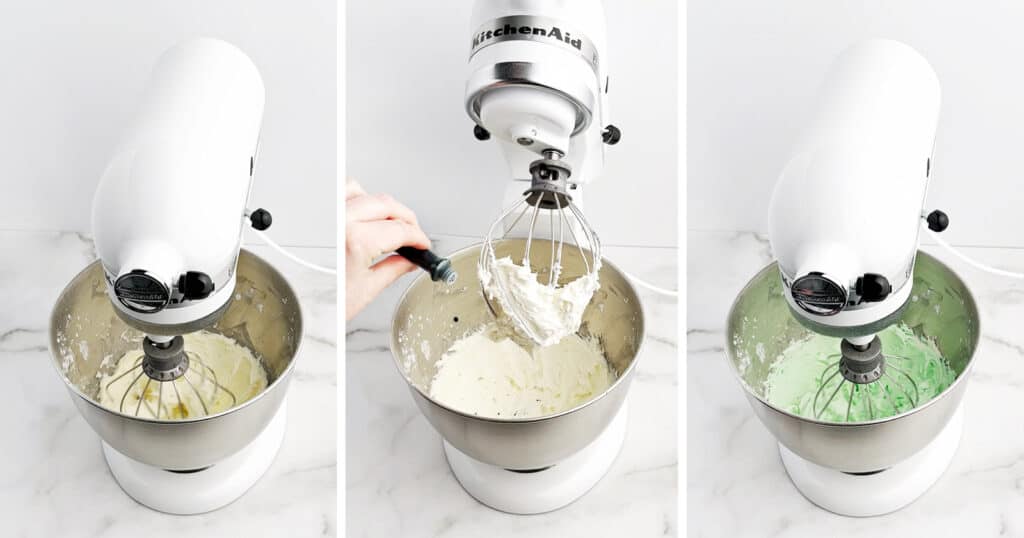
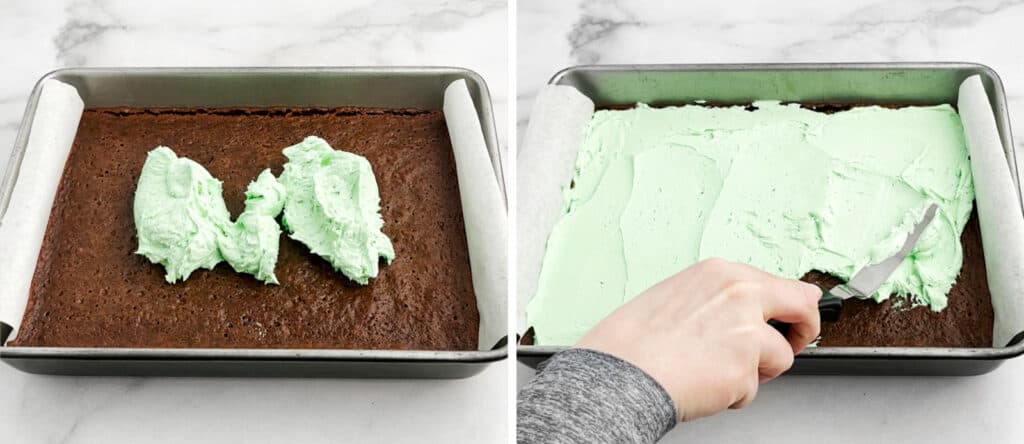
Step 10 | layer 2: MINT Filling – Spread on top of brownies
Once the brownies have completely cooled (Important – your filling will melt if they are still warm!), spread the mint frosting over the brownie layer. We like to use an angled spatula.
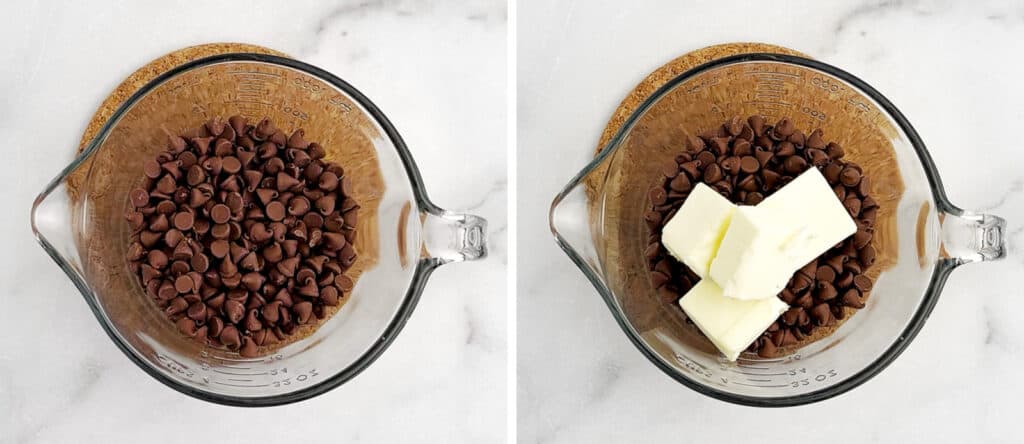
Step 11 | Layer 3: Ganache – Melt chocolate and butter
Place the milk chocolate chips and butter in a microwave-safe bowl. Microwave in small increments, stirring often, until the chocolate is melted and smooth.
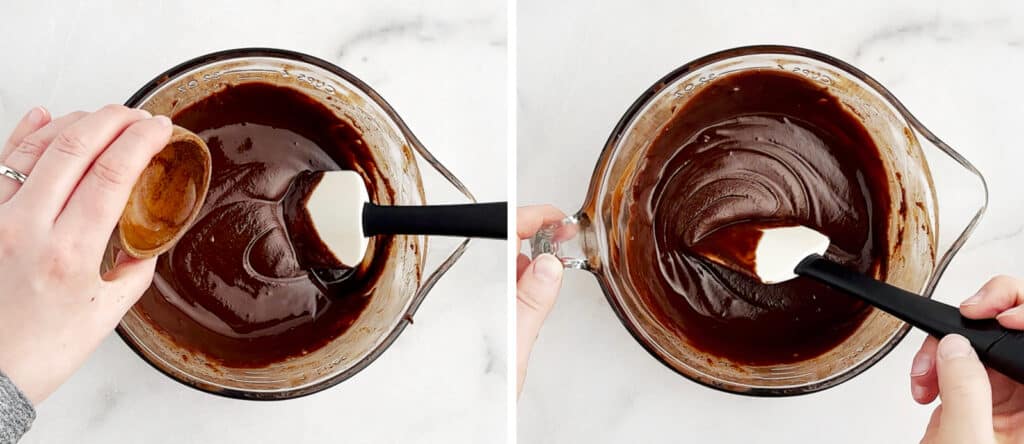
Step 12 | layer 3: Ganache – add mint extract
Add the mint extract to the chocolate mixture and mix well.
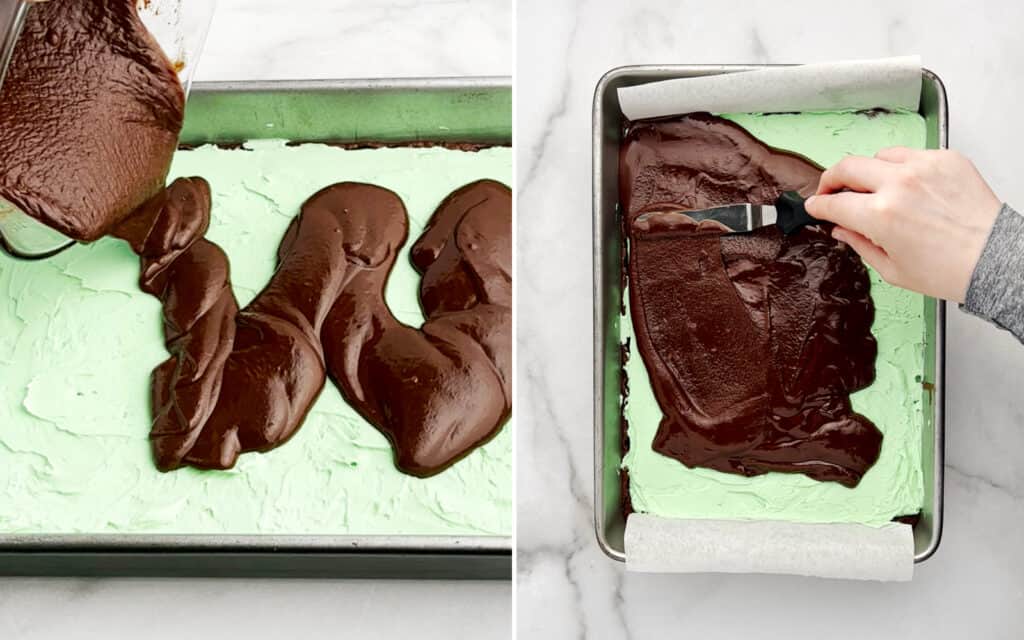
Step 13 | layer 3: Ganache – spread on top of mint filling layer
Pour the chocolate ganache onto the mint filling layer and spread evenly using an angled spatula or knife.
Step 14 | Allow to set
Before cutting, allow the layered brownies to set. Put them in the freezer for 20 minutes or in the fridge for 1 to 2 hours.
Note: for best results, don’t cut the brownies when they are warm or if the chocolate topping has not set.
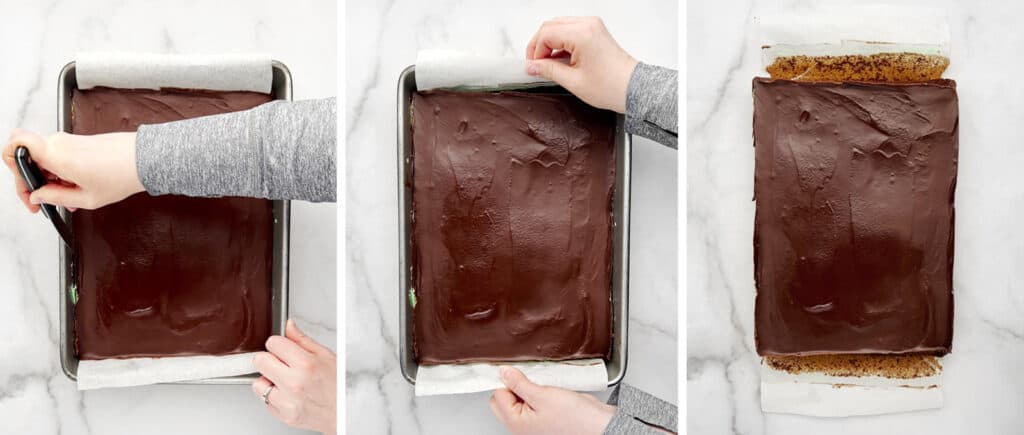
Step 15 | Remove brownies from pan
Run a knife along any edges without parchment paper. Then carefully lift the parchment paper ‘handles’ to carefully remove the brownies.
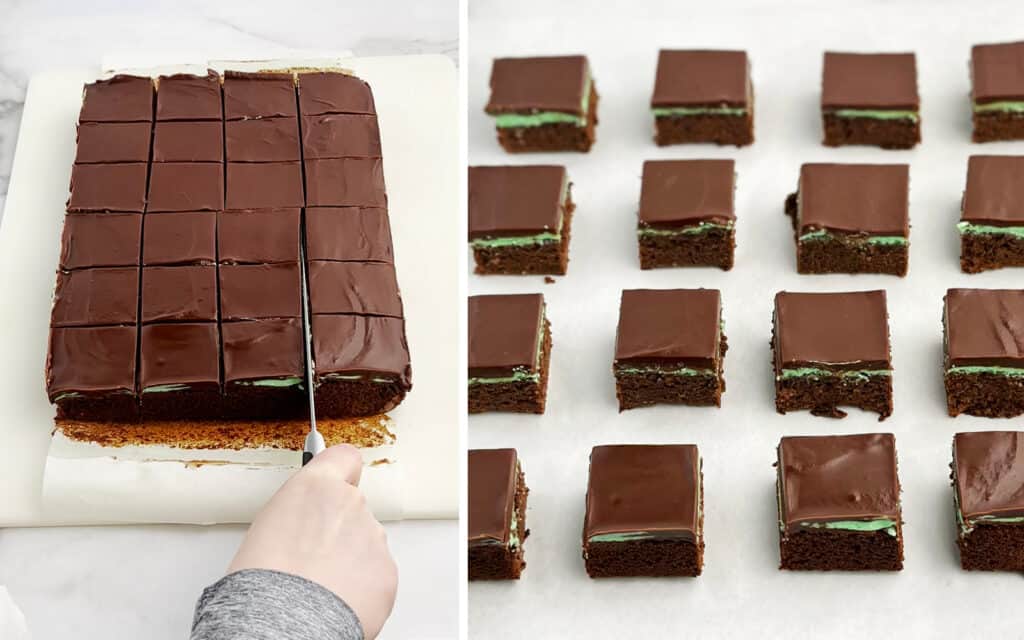
Step 16 | cut brownies
Cut the brownies into 24 equal pieces.
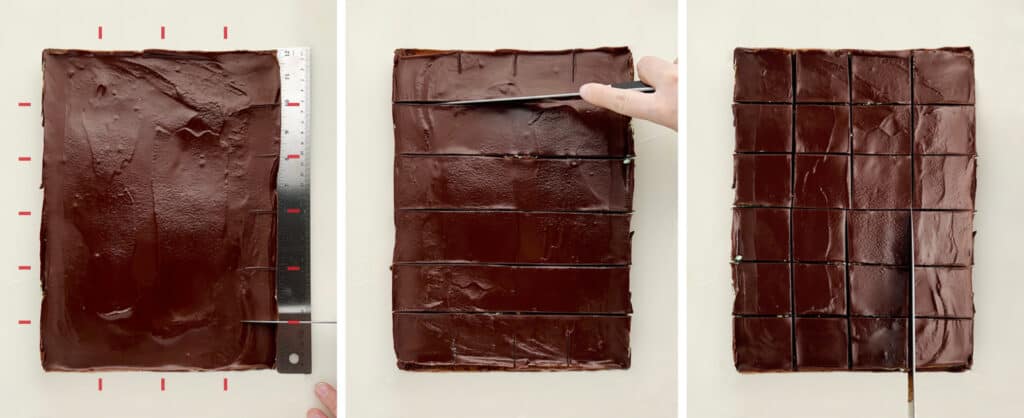
Tips for evenly cutting brownies:
- Use a 12-inch ruler to mark cut lines.
- On the long sides, center your ruler and mark the middle (6 inches) and then mark 2-inch sections from there.
- On the short sides, center your ruler and mark the middle (4 inches) and then mark 2-inch sections from there.
- Finally, cut the brownies by connecting the lines and slicing them through. If your knife isn’t long enough to cut the entire length of the longer sides – just cut to the middle 6-inch mark. And then repeat this on the other side.
- Wipe off your knife each time you cut.
Step 17 | Serve and enjoy!
Serve and enjoy immediately—or store them in the fridge or freezer in an air-tight container.
How to Store Mint Chocolate Brownies
Storing your mint chocolate brownies couldn’t be easier! To ensure that the brownies remain moist and delicious for as long as possible, store them in an airtight container.
When stored correctly, these brownies can last up to 5 days at room temperature or up to 10 days in the refrigerator. Need to store for longer? You can freeze these brownies for 1 to 2 months if needed.

Can I Freeze Mint Brownies?
Yes, absolutely! You can freeze mint brownies for 1 to 2 months when stored properly. To freeze your mint chocolate brownies, place them in an airtight container (plastic tupperware or metal tin) before transferring them to the freezer.
To thaw your frozen brownies, set them out at room temperature or in the fridge overnight or until they are no longer frozen.
Print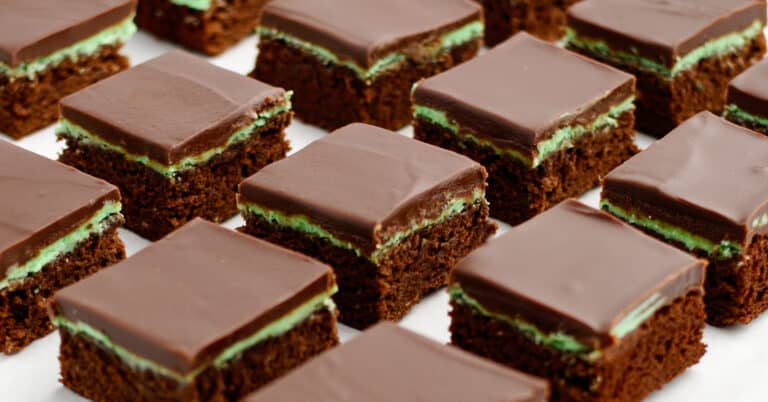
Mint Chocolate Brownies
Three decadent layers of brownie, mint filling, and ganache. The perfect green dessert for St. Patrick’s Day or when a chocolate and mint craving hits.
- Total Time: 1 hour 10 minutes
- Yield: 24 mint brownies 1x
Ingredients
Brownie Layer
- 1 cup flour
- 1/2 cup butter (softened)
- 1/2 tsp salt
- 4 eggs
- 1 can chocolate syrup (16 oz.)
- 1 cup sugar
- 1 tsp vanilla
Mint Filling
- 2 cups powdered sugar
- 1/2 cup butter (softened)
- 1 tbsp water
- 1/2 tsp mint extract
- 3 drops green food coloring
Chocolate Topping
- 1 pkg milk chocolate chips (10 oz)
- 1/2 cup butter
- 1/2 tsp mint extract
Instructions
- Preheat the oven to 350°F.
- Prepare baking pan with parchment paper. (see tips)
- Brownie layer – mix flour and softened butter. Then add salt, eggs, chocolate syrup, sugar, and vanilla. Pour into a 13 x 9 pan. Bake for 35-40 minutes or until a toothpick comes out clean. Important: cool entirely before adding the next layer.
- Mint filling – cream together powdered sugar, butter, and mint extract. Add 3 to 4 drops of green food coloring. Double if you prefer it a bit darker. Spoon mint filling over the brownie layer. Spread out evenly.
- Chocolate topping – place chocolate chips and butter in a microwave-safe bowl. Microwave in small increments, stirring often, until the chocolate is melted and smooth. Add mint extract to the chocolate mixture and stir. Pour chocolate topping over the mint filling layer and spread out evenly.
- Allow the brownies to set. Put them in the freezer for 20 minutes or in the fridge for 1 to 2 hours.
- Run a knife along any edges without parchment paper. Then carefully lift the parchment paper ‘handles’ to carefully remove the brownies. (For best results, don’t cut the brownies when they are warm or if the chocolate topping has not set.)
- Cut the brownies into 24 equal pieces. (see cutting tips)
- Serve immediately or store in an airtight container in the fridge or freezer.
Notes
- If you only want a hint of mint, leave the mint extract out of the top chocolate layer. (Leaving mint in the filling layer only.)
- For the chocolate topping (layer 2), you can also use mint chocolate chips—if you can find them (instead of chocolate chips and mint extract separately).
- See our tips for cutting brownies into equal pieces.
- See storage tips.
- Prep Time: 30 minutes
- Cook Time: 40 minutes
- Category: Dessert
- Method: Baking
- Cuisine: American
Nutrition
- Serving Size: 1 brownie
- Calories: 251
- Sugar: 22.8 g
- Sodium: 106.5 mg
- Fat: 13.6 g
- Saturated Fat: 8 g
- Carbohydrates: 30.6 g
- Protein: 2.3 g
- Cholesterol: 61.7 mg
⭐⭐⭐⭐⭐
Have You Tried This Recipe? Please rate it in the comments and let us know your thoughts!
More Delicious Chocolate Recipes
- Homemade peanut butter cups
- One cup chocolate chip cookies
- White chocolate peanut butter ritz cracker cookies
- Microwave chocolate fudge
- White chocolate puffcorn
Read More Baking Tips
Pin for later